Contents
- Invoice Status and Workflow
- Filter and View Invoices
- Edit the Invoice
- Print, Email and Export the Invoice
- Complete the Invoice
The Invoices tab enables you to
- review draft invoice created in the WIP tab,
- edit timesheet records,
- adjust billable hours and non-time units to achieve a specific revenue outcome,
- exclude selected timesheet records from the invoice,
- hide records to be included on the invoice,
- add additional invoice lines,
- modify bill-to address details
- print and email invoices to customer
- export invoices to your accounting package
- set the invoice status from Draft to Final, and then Final to Complete.
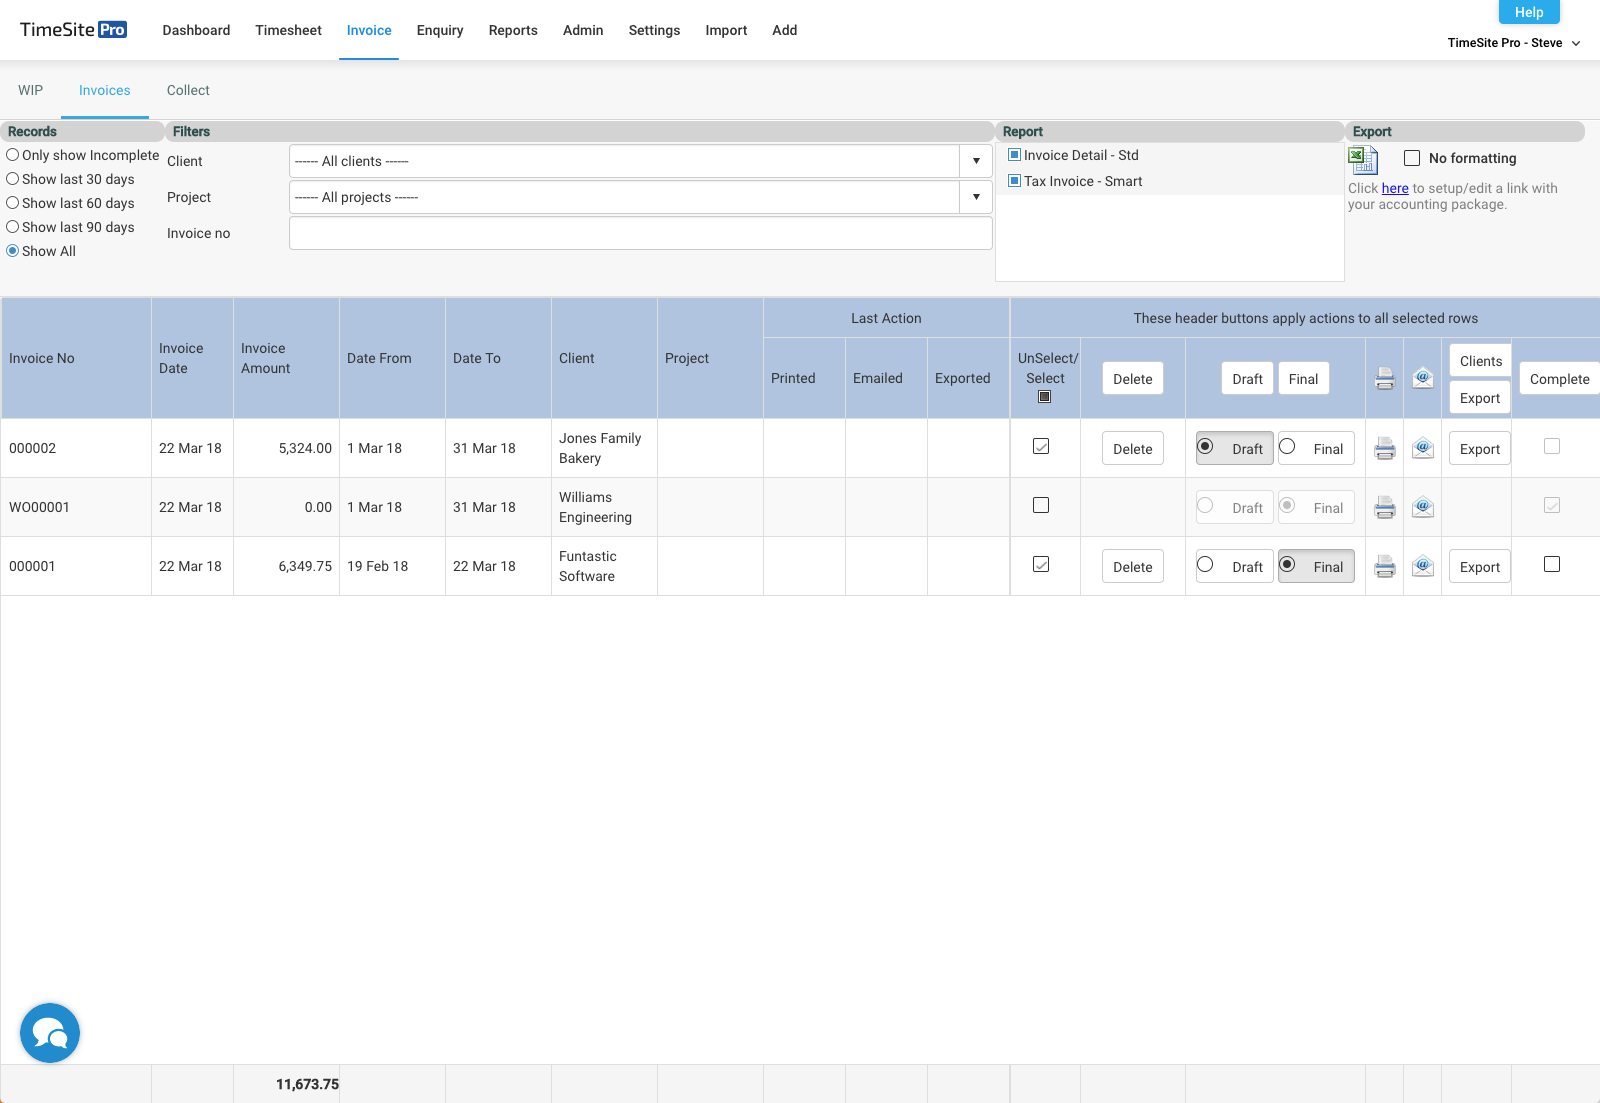
Invoice Status and Workflow
A Draft invoice is printed or saved to pdf format containing a Draft watermark. Once the draft invoice has been updated, it can be set to Final status and printed or emailed without the Draft watermark. Once all changes to the invoice have been completed and the invoice has been send to the client and/or exported to your accounting package, it can be sent to Complete status.
Only invoices set to Draft and Final status can be deleted. Invoices set to Complete status cannot be deleted. Completed invoices can be written off as a Bad Debt in the Invoice Collect stage.
Once the invoice has been set to Complete, timesheet records and extra invoice line items cannot be added to the invoice or edited. Nor can the invoice be exported to your accounting package. The next set of activities relating to this invoice will be managed in the Collect tab.
Only invoices set to Final and Complete can be processed for remittances in the Collect tab.
Filter and View Invoices
Use the Records options to display only incomplete invoices (Draft and Final), all invoices (including Complete), and dated within the last 30, 60 or 90 days.
Use the Filters options to select and display all or a selected Client, all or a selected Project, or Invoices by invoice number.
Click on an invoice row to open up the invoice details for review and editing before finalising the invoice.
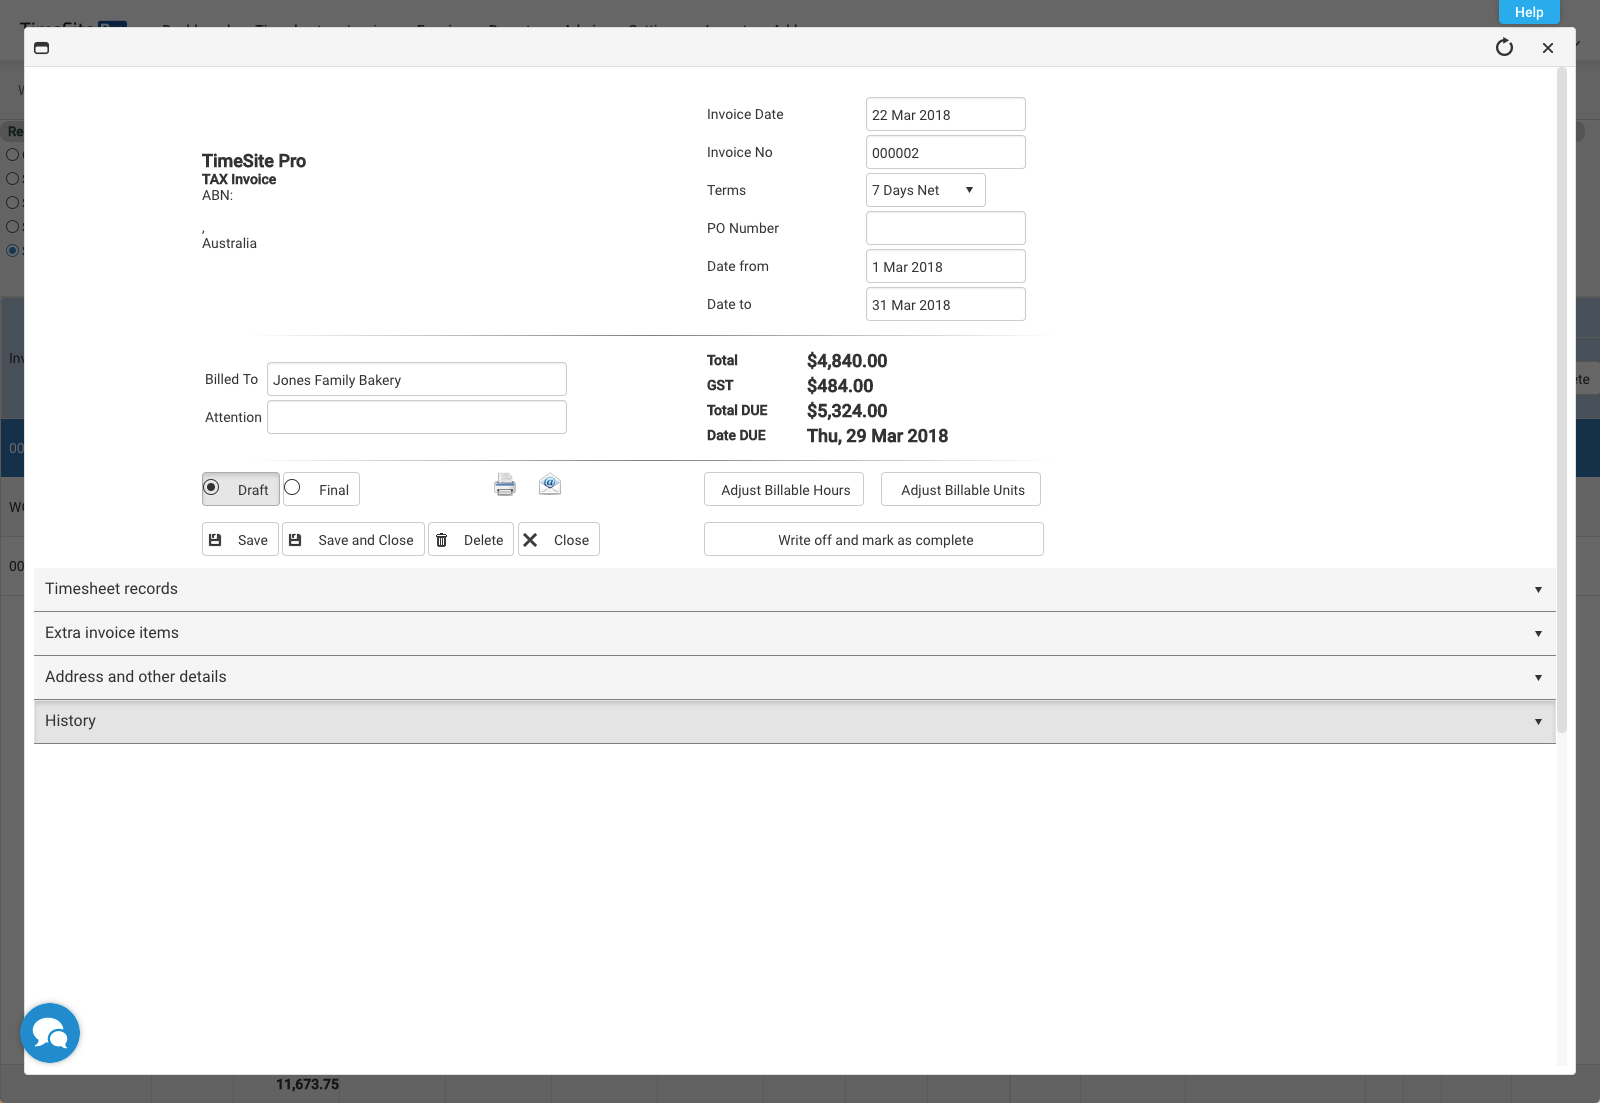
Edit the Invoice
Once the invoice processing panel is open, you will be able to
- edit, exclude or hide timesheet records,
- add extra invoice line items,
- add or edit bill to address and other details, and
- review a history of changes made to the invoice.
Note that the invoice can be edited in both Draft and Final stages. An invoice cannot be edited when set to Complete.
Timesheet Records
Click on the Timesheet records bar to open up the list of timesheet records that have been included in this invoice.
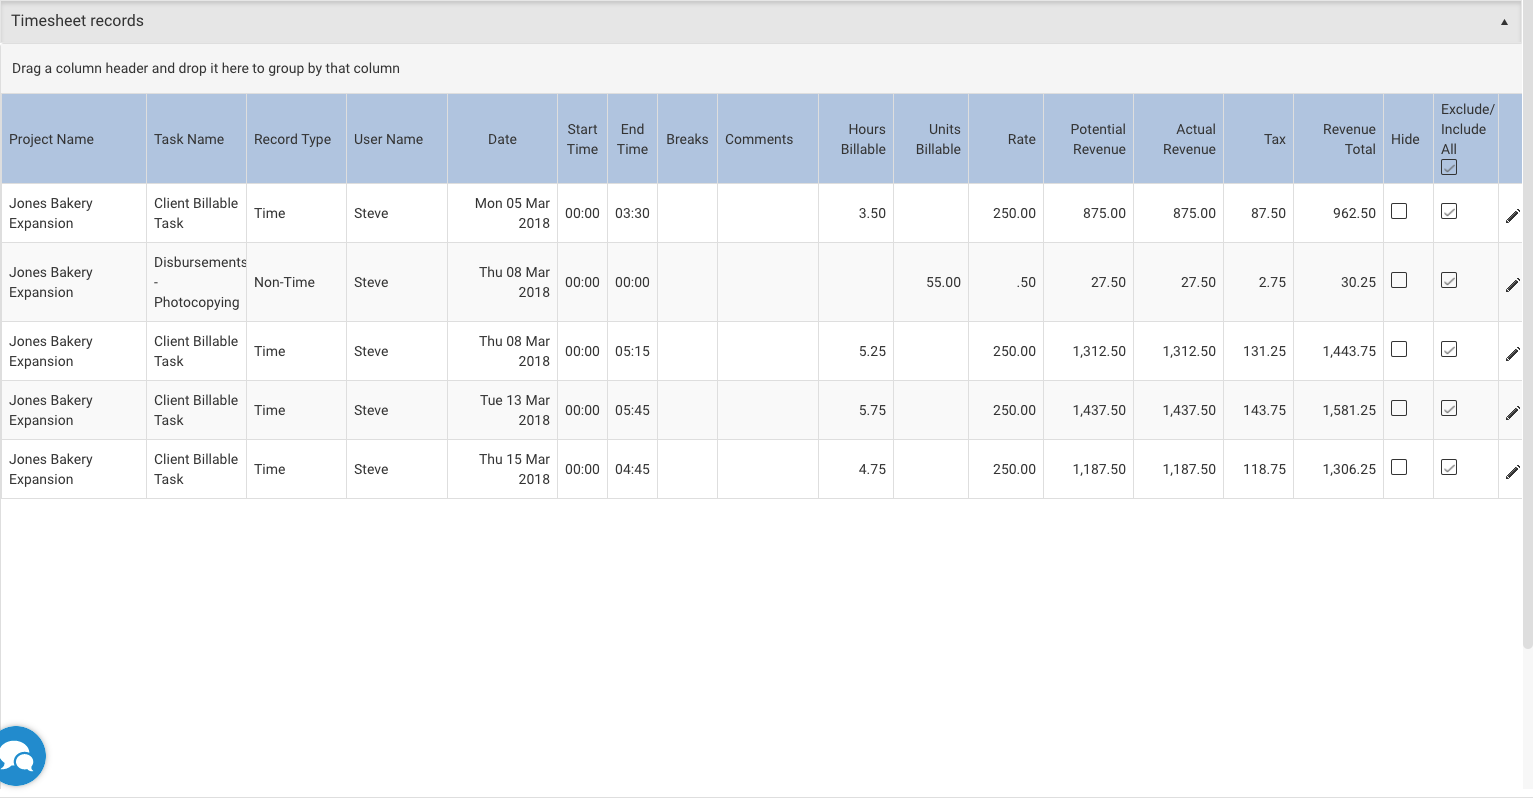
Click on a timesheet record to open up the Edit a Record panel where you can edit certain details excluding Client/Project/Task. Click in the Hide column to hide but include a timesheet record in the invoice. Click in the Exclude/Include column to exclude a timesheet record from the invoice. Drag a column header and drop it here to group by that column.
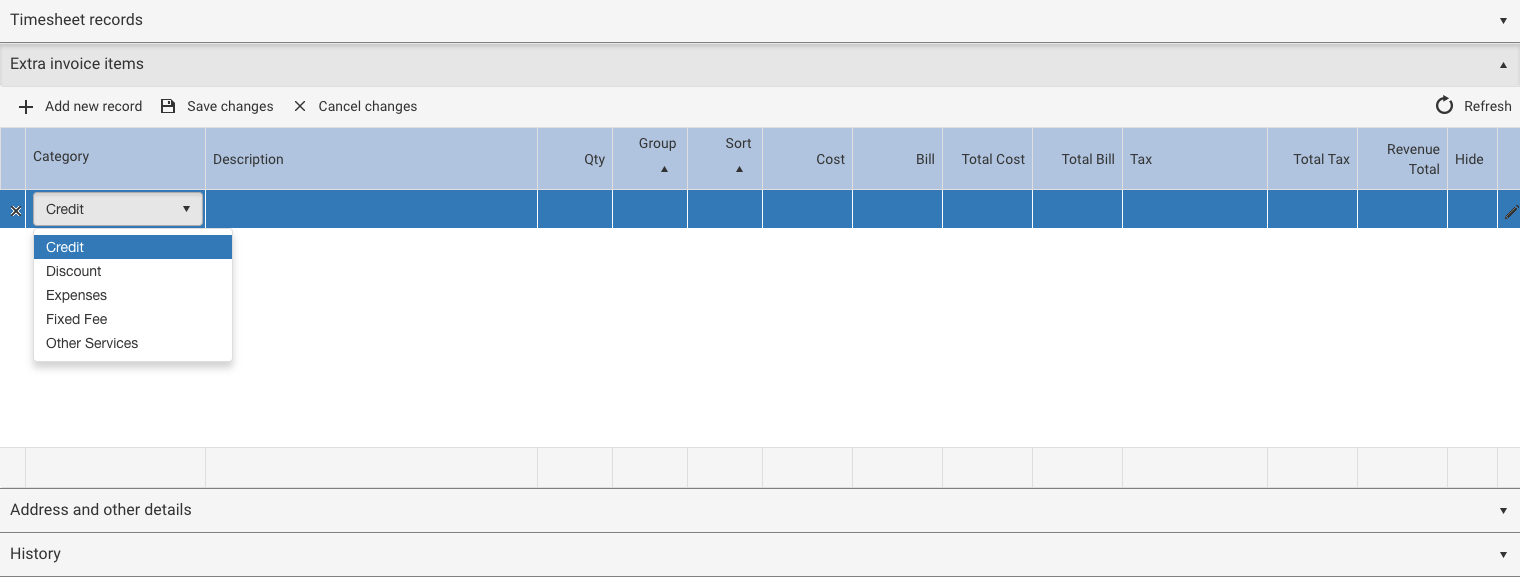
Extra Invoice Items
Click on the Extra invoice items bar to open up the list of any additional invoice line items to be included such as Credit, Discount, Expenses, etc. These items are defined in Settings > Accounting > Invoice Item Type.
Address and other details
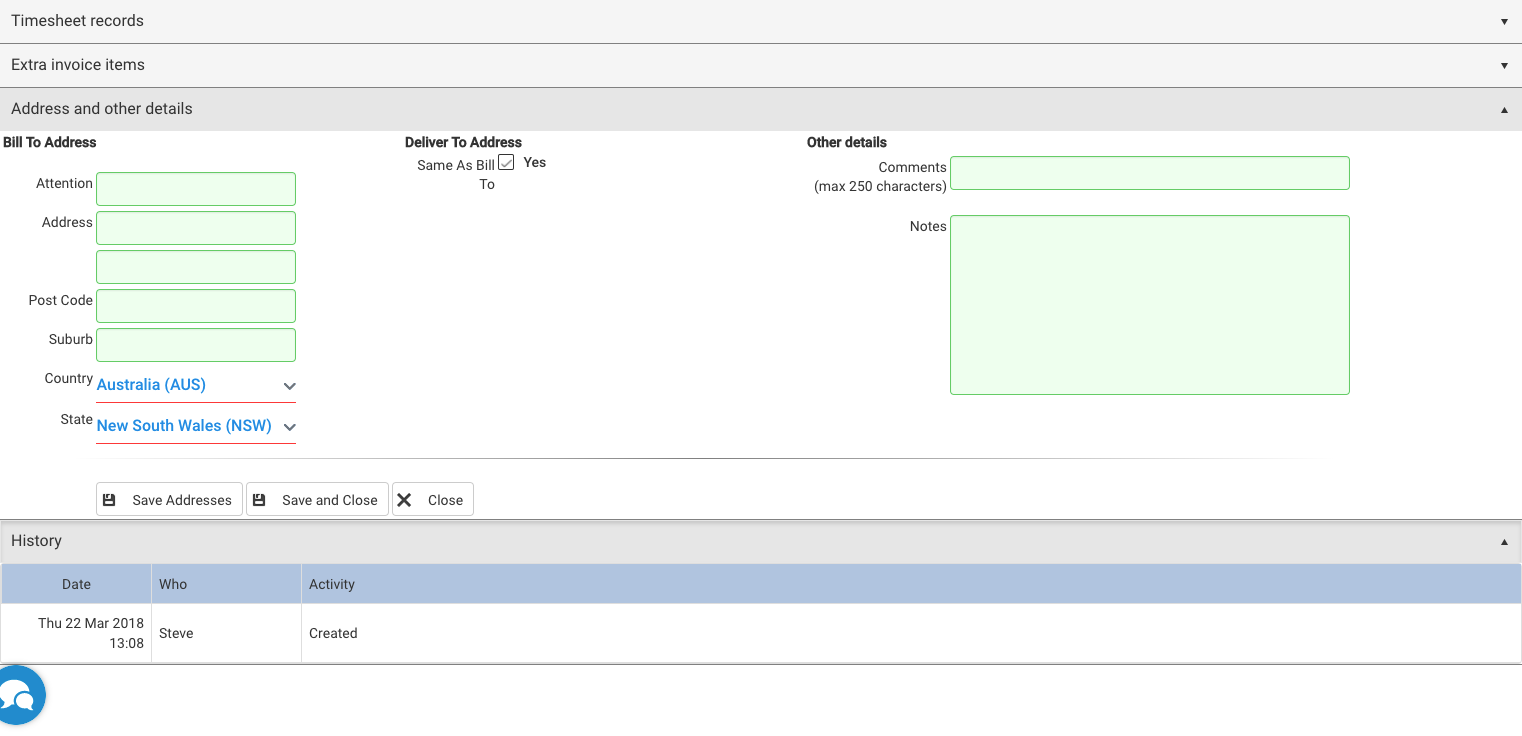
Click on the Address and other details bar to open up and edit bill-to and deliver-to address, comments, and notes.
History
Click on the History bar to review the history of updates made to the invoice.
Print, Email and Export the Invoice
Once you are ready to print the email or email it to your customer, you can change its status from Draft to Final. This means that the Draft watermark is removed from any invoice report selected from the Report list.

You can click the Export button to export the invoice or selected invoices to your accounting package via an export file or directly depending on how your accounting interface is set up in Settings > Export > Settings.
Complete the Invoice
Once the invoice edit process is complete, and the invoice has been sent to the client and exported to the accounting package, it can be marked as Complete with regard to TimeSite Pro's invoice processing activities.
Click the tick box next to the invoice in the Complete column.
Comments
0 comments
Please sign in to leave a comment.